So you have purchased one of my hybrid RB67 conversion kits for Impossible Lab and are ready to convert it into a Polaroid Back!
In order to convert your Mamiya RB67 to shoot old and new Polaroid Integral film, you will first need an Impossible Project Polaroid Lab.
The instructions below are designed for the conversion of the Impossible Lab into an Impossible Project Polaroid Back for Mamiya RB67 (only).
Before you start converting your Impossible Lab, I recommend testing the battery life. It’s no fun getting a polaroid frame stuck because of a dead battery.
By the way, the process is 100% reversible in case you ever want to go back to using your Polaroid Lab as a digital-analogue conversion device as it was intended to be use in the first place. Well, kind of, since the latest version of the kit does involve gluing one of the parts, but it can still be snapped off. And you will probably never go back to this being a printer, since Polaroid has released a Polaroid Printer now..
You do not need anything else to attach the back to your RB67 once this is completed (no P adapter).
Just remove the revolving back (there’s a clasp on the bottom), and replace it with your new Analogue.Studio Polaroid Back!
Now let’s proceed:
First, watch the previous video and disassemble your lab!
Next watch this!
And if you need a demo on how to use the back, go to the How to use your Analogue Studio Polaroid Back for RB67 Rescue Me section!
Build Notes #1:
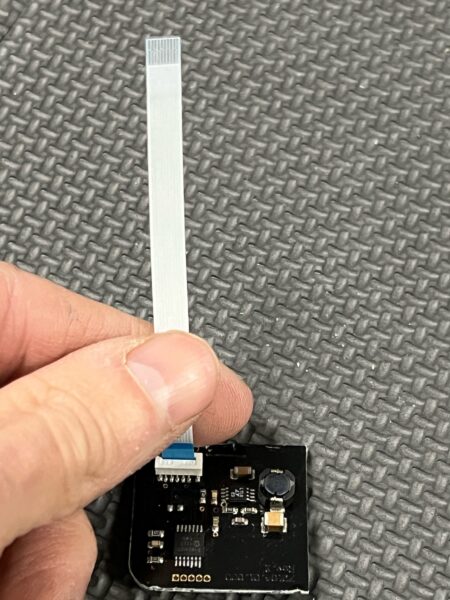
- In case you happen to disconnect the ribbon cable from the eject board, and you’re not sure how to orient it when you plug it back in, here’s a photo:

It may also happen that the lab “resets” and won’t eject when you reconnect the ribbons at both ends. Assuming they’re connected correctly (blue tape oriented correctly), simply plug in the lab, then press the eject button. This should reset the board and you should be good to go.
Build notes #2. Avoiding Light leaks from the top:
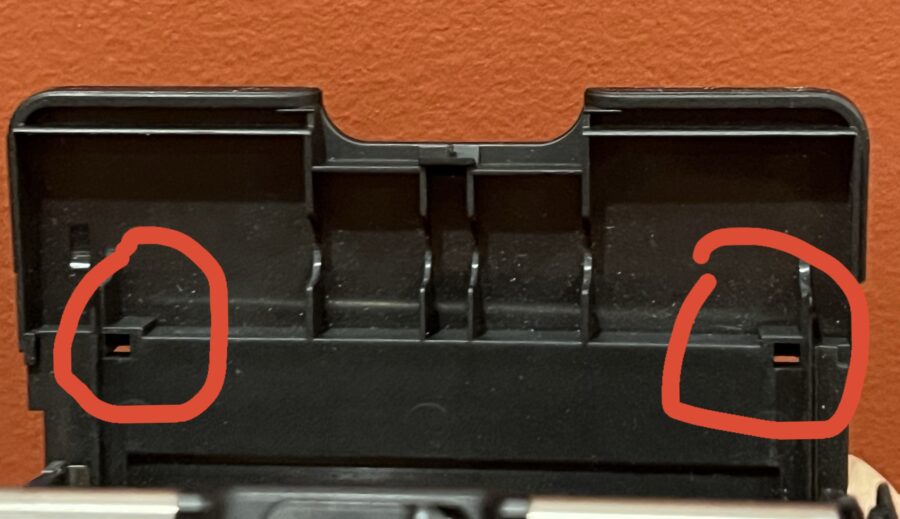
Notice the top piece with the Analogue.Studio logo included in your kit? Please glue it in place, it is NOT decorative only, it serves the purpose of closing two little slots in the Impossible Lab.
It’s also possible that may not seal those square slots completely. I am including some extra adhesive felt with kits lately, use two little squares to plug those square slots from the bottom. You may also use sugru or just about anything else, just make sure it stays in place and it won’t come out.
